No List Cache
Sometime, in an In Collection Validator, you would get a “Cache Property not in Cache” error.
Make sure to check the “No List Cache” check box. This will force to refresh IDO collection in Cache.
Sometime, in an In Collection Validator, you would get a “Cache Property not in Cache” error.
Make sure to check the “No List Cache” check box. This will force to refresh IDO collection in Cache.
Open the component class “UserDefinedType”, go to validator, add one more parameter %2 to the UserDefinedTypeValue validator.
Open the validator, make sure %2 is there.
Then open the property of the validator.
Open the Parameters screen
Set %=Description in Set Prop/Var/Comp section.
OK all the way back to save the change in Component Class. Now we have component class “UserDefinedType” ready to show description of user-defined-type as second parameters.
To use the component class, just put the field that you want the description display on as second paramenter of component class. Here is sample,
I have been trapped on this more than one time. In order for a method call validator to work, the return value has to be bigger than 5. This is clearly state in the WinStudio document: “If the method returns a value less than 5, WinStudio passes the validation. Otherwise, WinStudio fails the validation. The values 1 through 4 are used for warnings.”
All the standard Syteline Validators are using return value 1, so you would naturally copy that logic, and have it kept pumping on your face. The value 1 through 4 are reserved for system use. For customization developer like you and me, we have to be taller than 5.
Today I have waste two hours on this. I knew it can not be 1, because I was trapped on this about a year ago. But I forgot what the exact value benchmark is. I was putting a value 4 on it. And keep searching other area for error. Finally I checked back into the document and found out again the magic number 5. What a fool.
Problem:
Many business would not allow product shipped to a “PO Box” address. So would like to block any “PO Box” address being entered into any ship to address.
Solution:
1) Enter design mode of “Customer Ship Tos” Form.
2) We are going to first create a script. Go to “Menu -> Edit -> Script”, a Script window should open. Click “New”, enter Script Name called “NoPOBox”, then click OK.
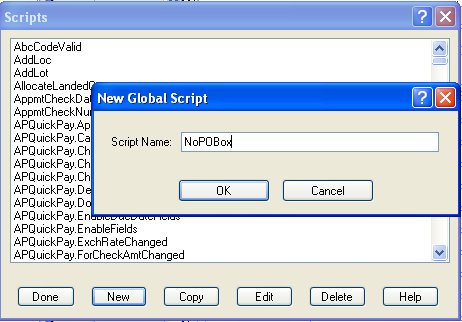
Put in the following script:
Option Explicit On
Option Strict On
Imports System
Imports Microsoft.VisualBasic
Imports Mongoose.IDO.Protocol
Imports Mongoose.Scripting
Namespace SyteLine.GlobalScripts
Public class NoPOBox
Inherits GlobalScript
Sub Main()
Dim strValue As String
Dim logicYN as boolean
Dim logicYN1 as boolean
Dim logicYN2 as boolean
Dim logicYN3 as boolean
Dim logicYN4 as boolean
strValue = GetParameter(0).ToUpper()
logicYN = strValue like “*PO BOX*”
logicYN1 = strValue like “*P.O BOX*”
logicYN2 = strValue like “*P.O.BOX*”
logicYN3 = strValue like “*PO. BOX*”
logicYN4 = strValue like “*P.O. BOX*”
If logicYN or logicYN1 or logicYN2 or logicYN3 or logicYN4
ReturnValue = “1”
else
ReturnValue = “0”
end if
End Sub
End Class
End Namespace
Then “OK” to save the Script, and “Done” to close the Script window.
3) Create a Validator.
While we are still in the design mode of “Ship Tos” Form, from menu, go to “Edit -> Validator”. A “Validator” window open, click “New”. In the “Validator Properties” window, enter “NoPOBox” as name, “Run Script” as type. Select “NoPOBox” as script name from the pull-down list, that is the script we just created in step 2).
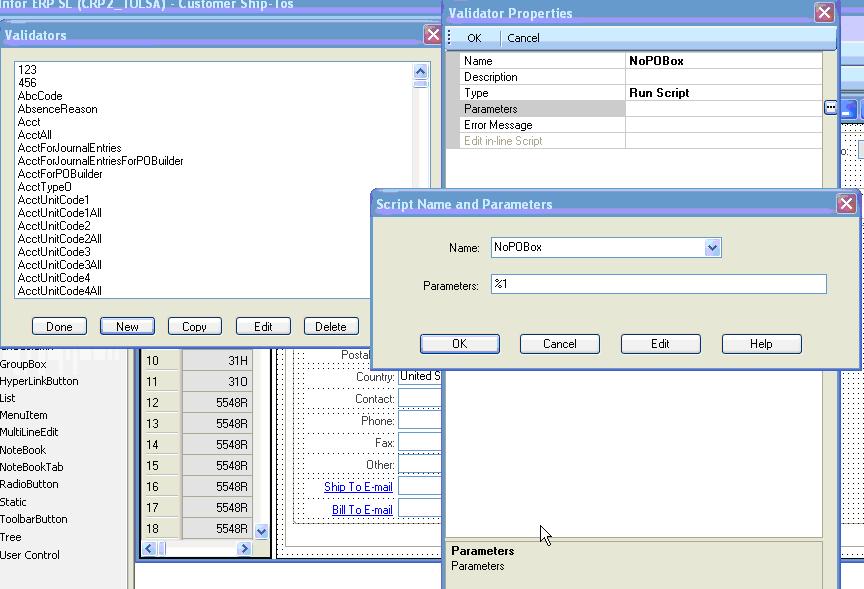
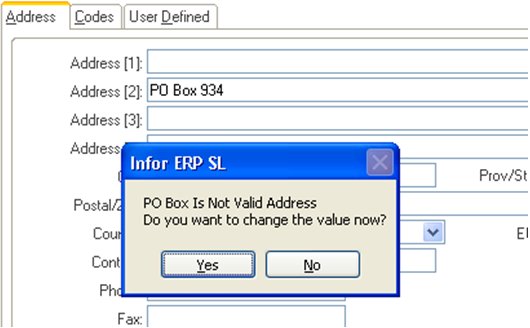
Then, create Error Message: “PO Box Is Not Valid Address”.
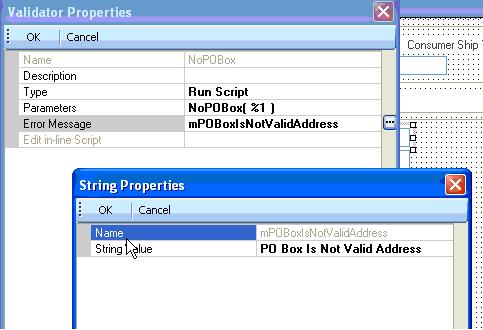
Click OK all the way back, we now have created a validator called “NoPOBox”, and we can apply it to the fields that we want to validate.
4) Apply validator
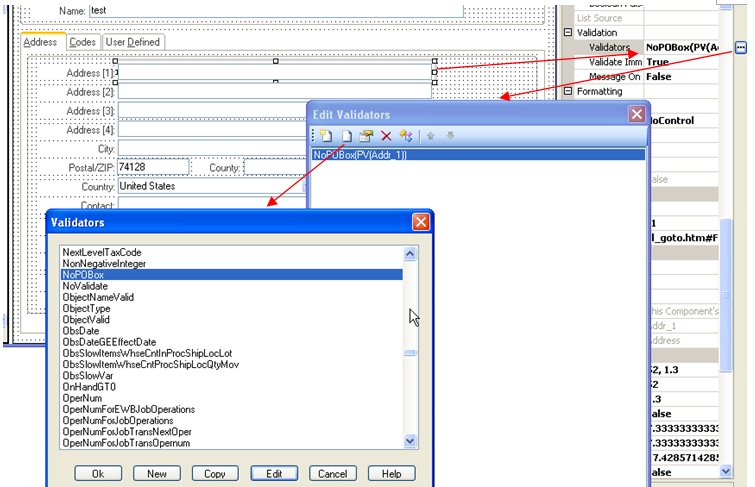
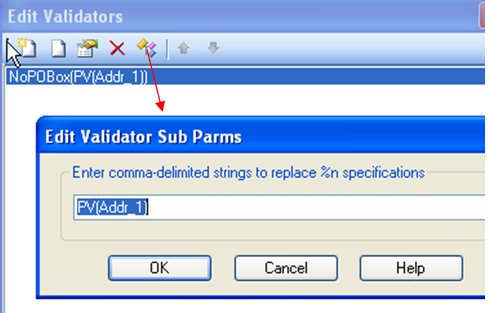
Click to enter PV(Addr_1), that means property value of Addr_1, as parameters.
5) Now save the change and exit out of design mode, we should be able to see the validation is working:
Recent Comments