APS Implementation Considerations

February 11th, 2014 No comments

Below are some of points that are worth taking, while implementing APS in Syteline.

1. Implementing APS is an all or nothing process.  Partial effort will result in failure.

2. APS requires you to rethink your business process related to promising to customers; ordering materials and releasing work into production.   Sometimes it is difficult to change old mindsets and ways of doing things.

3. APS requires that everyone is on board from management to customer service to planning to buyers to production.   Resistance in any of these areas will result in failure.

4. Setting expectations is vital.  APS is a tool.  It provides extreme visibility.  It also quickly exposes bad data and poor business process.  It does not fix data and it does not fix poor business practice.

5. Allow adequate time to review your existing data model and sufficient time to pilot through the APS process.  Most implementation failures can be attributed to ignoring this step.

6. Data elements: Routings – start with what you have.  A significant amount of benefit can come from existing messy routings.  It is only a small amount of routings that need to be high quality.

7. Data elements: BOM’s – accuracy should be higher for BOMs; but these days that is typically true.

8. Data elements: Work centers – make sure that you understand the WC / Resource Group / Resource model of APS.  Limit the number of constrained (finite Resource Groups / Resources) – typically no more than 30% of resources.  Start with only a single Resource Group on operations.

9. Data elements:   Inventory – must be accurate and must have processes in place to keep it accurate.

10. Data elements:  Past Due Customer Orders, Purchase Orders, Jobs.   Complete or delete old Purchase Orders and Job Orders.  Do a one-time adjustment of Past Due Customer Orders to reflect current delivery reality.

11. Data elements:  Purchase Item Lead Times – review and adjust for accuracy.

12. Don’t wait until you have pristine data or you will never start.  Initiate an ongoing process to keep standards current.  This is NOT a one-time process; but a forever process.  The process of piloting APS with your current data will immediately show you bad data.  This is why is imperative to allow sufficient time in your piloting to review APS results.

13. Determine if you have the ability to negotiate Due Dates with your customers.  This will dictate how useful Get ATP / Get CTP are.  Make promises you can keep.

14. Limit the number of drop-ins Customer Orders.

15. Follow ‘launch control’.  Don’t create Jobs manually.  Don’t release jobs until APS recommends.  The same is true for purchase orders.

16. Don’t ‘second guess’ the plan.

17. Follow the Dispatch Lists.

18. Monitor on a daily basis projected late Customer Orders, projected late job orders, Item Bottlenecks, Resource Bottlenecks in order to anticipate problems.

19. Record labor and material transactions timely and accurately.  Close jobs in a timely manner. 

20. Pilot, pilot, pilot.

Categories: Application, Implementation Tags: , ,

Turing Trigger program off, update some data, then turn Trigger back on

February 5th, 2014 No comments

Table trigger is important part of Syteline data integrity.  There are many validation logics safe guarded by trigger program.  But in some circumstances, you may want to turn the trigger program off, in order load certain data.  This is specially true during data conversion of your Syteline implementation, you may need to use program to load data from outside data sources.

Below sample program will turn the trigger off, update jobmatl table, then turn the trigger back on again.

declare @SavedState LongListType

, @Infobar InfobarType

EXEC dbo.SetTriggerStateSp

@SkipReplicating  = 1

, @SkipBase         = 1

, @ScopeProcess     = 1

, @PreviousState    = @SavedState OUTPUT

, @Infobar          = @Infobar  OUTPUT

, @SkipAllReplicate = 1

, @SkipAllUpdate    = 1

UPDATE jobmatl

SET pick_date = @Today

FROM #JobmatlForPickList as jm

WHERE jobmatl.RowPointer = jm.RowPointer

exec dbo.RestoreTriggerStateSp

@ScopeProcess    = 1

, @SavedState      =  @SavedState

, @Infobar         = @Infobar OUTPUT

Categories: Development, Implementation Tags:

Add, Change Multi-Sites Replication Rules

January 6th, 2014 No comments

There is simple three steps process for adding/changing replication rules in Syteline.

1) Add/Edit rules in Replication Rules form

Notes: you setup all rules for source site in source site DB.

2) Regen trigger

Open “Replication Management” form,

Regen the replication trigger.

This will make the trigger program in place to replicate transactions from now on.

3) Run the Manual Replication Utility

This will replicate all the existing records, by letting the create date and modified date blank.

Setting Up a Master Site and Shared Tables

December 18th, 2013 No comments

About Shared Tables and Master Sites

In a multi-site environment where there are many sites, large amounts of data, and many users, you may want to set up one site as the master site for an intranet. In that case, certain _all tables and user tables can reside only on the master site database and are shared (read and written to through a SQL view) by other sites on the same intranet. No replication needs to occur for the shared _all and user tables, which can greatly improve system performance.

Steps to Set Up a Master Site and Shared Tables for All Sites on an Intranet

Follow these general steps. Refer to the forms and fields for detailed information. You can share _all tables, or user tables, or both types of tables.

Planning

CAUTION: You must plan your multi-site structure carefully before setting up the shared tables. This requires in-depth understanding of the SQL databases, this application’s replication capabilities, and your corporate financial reporting requirements. Refer to the Multi-Site Planning and Replication Reference documents on our support site for more information.

Set Up All Sites on the Intranet

The following steps assume that you have already used the Configuration Wizard during database server installation to link your multi-site databases.

In the Intranets form, specify all intranets to be used in this multi-site system. If you will be sharing _all tables, define an intranet that will include all the sites that share tables. This cannot be an "External" intranet. All the sites on this intranet must use the same version of this application.

Do not define the master site yet – that will be done later.

In each site and entity, use the Sites/Entities form to specify information about this site/entity and the other entities and sites that it relates to. Each site/entity has a record in this form.

On the System Info tab, specify information about the site. Make sure the Intranet Name, Database Name, and Time Zone are set correctly for each of the sites and entities listed on this form.

A list of linked sites displays automatically in the Link Info tab. The local site record shows links used in transactional replication between the currently selected site database and other site/entity databases. On site records other than the local site, the Link Info tab should show only links to the local site.

Use the Replication Categories form to specify tables, stored procedures, and XML documents that should be replicated and to group them into categories. The installation process creates some categories. Do not delete these standard categories. These categories have been created and tested to ensure that they handle the standard system processes. They should meet most of your needs without requiring any changes.

On the Replication Rules form, set up transactional rules for the Site Admin replication category between this site and all the other sites in the intranet, including the site that will be the master site. (Site Admin data includes tables such as site, intranet, and intranet_shared_table.) You may also want to write other rules to replicate certain categories between certain sites. Even if a category contains _all tables that you are sharing, you probably want to write a replication rule for the category. (Any shared _all tables will not be replicated in this case.) Categories may contain additional base tables or stored procedures that are needed to perform certain functions. The rules you need should be determined in the multi-site planning phase.

On the Replication Management form, click Regenerate Replication Triggers. This ensures that site and intranet data is replicated to all the linked sites.

Set Up the Master Site

Log in to the site that you want to make the master site where the shared tables will exist for the intranet.

On the Intranets form, select this site’s intranet. In the Master Site field, select this site to specify it as the master site for the intranet.

Share _All Tables

Log in to the master site.

On the Intranet Shared Tables form, select this site’s intranet.

A list of the _all tables that can be shared displays. (Not every _all table is listed; some are not available for sharing.)

For tables that you want to be shared between all sites on the intranet, select Shared.

Another way to choose the shared tables is to select the replication categories that you want to share. When you select a Replication Category from the drop-down list and click Select by Category, the system marks _all tables in that category as Shared.

When you have selected all the tables you want to share, select Actions > Save.

Click Process to copy information from the tables at the other sites to the master site’s table, delete the table from the other sites (creating views into the master site tables instead), and regenerate the replication triggers for the other sites. If you have selected several tables and have many sites on this intranet, processing may take a while. The Processing Step area displays the system’s progress.

CAUTION: During processing, the selected tables are removed from all sites on the intranet except the master site. Unsharing (rebuilding the tables at the using sites) is time-consuming – so be very sure that you have everything set the way you want it before clicking the Process button.

During processing, the system validates link setup between the master site and the using sites of an intranet. If it finds a problem, an error message displays and nothing is processed; fix the link and then click Process again.

The Processed field indicates which tables have been processed – for example, if shared, they are now resident only in the master site’s database. (Once a row on the form is marked as Processed, subsequent "Process" runs will not reprocess that row.)

After processing all the tables and sites, the system regenerates the replication triggers at the master site.

Share User Tables

Log in to the master site.

On the Intranet Shared User Tables form, select this site’s intranet.

Two lists of tables display:

The top grid lists user tables that can be shared. You cannot edit this list. You cannot select or clear the option for individual tables, with the exception of the AccountAuthorizations or UserGroupMap tables.

The bottom grid lists tables that contain a column whose base domain is UserNames.UserId or GroupNames.GroupId. The bottom grid is used during set up of shared user tables to identify the tables and columns that may need to be updated if records that were formerly defined in the Usernames or Groupnames tables in the non-master site are moved to the master site, but with different UserId or GroupId values.

If you have custom tables that contain a column whose value comes from base domain UserNames.UserId or GroupNames.GroupId, add your custom table and its associated ID column to the Non-Shareable Tables grid. We recommend that your custom tables refer to the Username or Groupname columns, rather than the ID columns, because the distinct list of Usernames and Groupnames across intranet sites is always the same, whether they are stored in shared tables or per site, and therefore no changes are required for data referencing this base domain.

Select Set up shared user tables to select Shared for all tables in the top grid and Update Referenced ID for all tables in the bottom grid. If you want to maintain the AccountAuthorizations table or the UserGroupMap table at each site, clear the Shared check box for those tables.

Click Process to copy information from the tables at the other sites to the master site’s table, delete the table from the other sites (creating views into the master site tables instead), and regenerate the replication triggers for the other sites. If you have many sites on this intranet or many users and groups, processing may take a while. The Processing Step area displays the system’s progress.

During processing, the system validates link setup between the master site and the using sites of an intranet. If it finds a problem, an error message displays and nothing is processed; fix the link and then click Process again.

The Processed field indicates which tables have been processed – for example, if shared, they are now resident only in the master site’s database. (Once a row on the form is marked as Processed, subsequent "Process" runs will not reprocess that row.)

The Status field indicates whether the user tables are shared or not shared.

After processing all the tables and sites, the system regenerates the replication triggers at the master site.

After processing is complete, you must reapply a valid license document on the master site. If the current master site is not enabled for intranet licensing, you must also apply a valid license document on all other sites on the master site’s intranet.

Adding a New Sharing Site (Changing the Intranet Value of a Site)

NOTE: A site’s intranet value cannot be changed if that site is already part of a sharing intranet, or if the site is a master site.

If you want to add a new site to a existing shared tables intranet, follow these steps:

Log in to the site you want to add.

Make sure the Replication Categories and Replication Rules on this site, and on other sites on the shared tables intranet, are set up to replicate Site Admin data to and from this site as desired.

In the Sites/Entities form, change this site’s Intranet value to the name of the shared table intranet and save the record. When you save the record, the system may display a message telling you that this process may take some time. (It copies shared _all table information to the master site and drops the tables from this site.) Saving the record also regenerates the replication triggers at this site and at the master site.

If you have set up rules between other (non-master) sites and this site, log into those sites and regenerate their replication triggers.

Setting Up Shared User Tables at a New Site

When you are already sharing user tables, and you add a new site to the current master site’s intranet, you may also want to set up the new site to share user tables. To do this:

In the Intranet Shared User Tables form, select the Set up per site user tables check box and click Change Setup Option to change the check box label to Set up shared user tables.

Click Process.The status of the shared tables is checked as each site is processed. If sharing has already been set up for a site, no processing occurs for that site, and the process continues with the next site. When it encounters a site that is not already set up, the site is processed.

Replication to Remote Sites

If there are other intranets with sites that want to replicate (not share) _all or user table data to/from sites in the sharing intranet:

For tables that are shared, set up replication categories/rules between the master site and the sites on the other intranets.

For tables that are not shared, set up replication categories/rules between any/all of the sites in the shared intranet and the sites on the other intranets.

Example

Intranet 1:

Site A (master site. Item_all table is shared)

Site B

Intranet 2:

Site C

Site D

If Site B needs visibility into Site D’s item data, replication rules should be set up from Site D to Site A.

If Site D needs visibility into Site B’s item data, replication rules should be set up from Site A to Site D.

If Site C needs visibility into Site B’s customer data (not a shared table), replication rules should be set up from Site B to Site C.

If a Shared _All Table Has Schema Changes

If one of the shared _all tables at the master site has a schema change, you will need to update the views into the _all table at the user sites on the intranet. To do this:

Log in to the master site and go to the Replication Management form.

Click the Regenerate Views to Master Site button.

Syteline and BarTender Integration

December 16th, 2013 No comments

Starting from Syteline 8.03, the Pick, Pack, Ship function utilize BarTender for bar code label printing.  

Create label templates in Bartender.

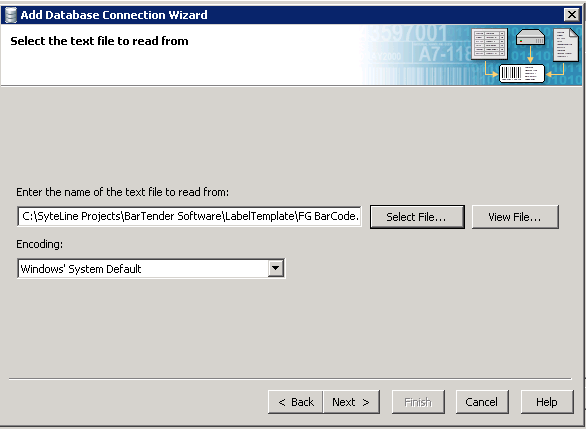
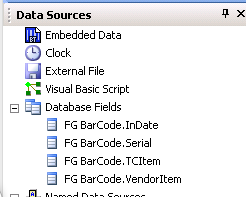
The label template in Bartender need to use text file as database source.

Create a sample text file with data like following,

TC280847|123456789012345|DGM17ALS|03/03/2014

When we done, we should have data source like this,

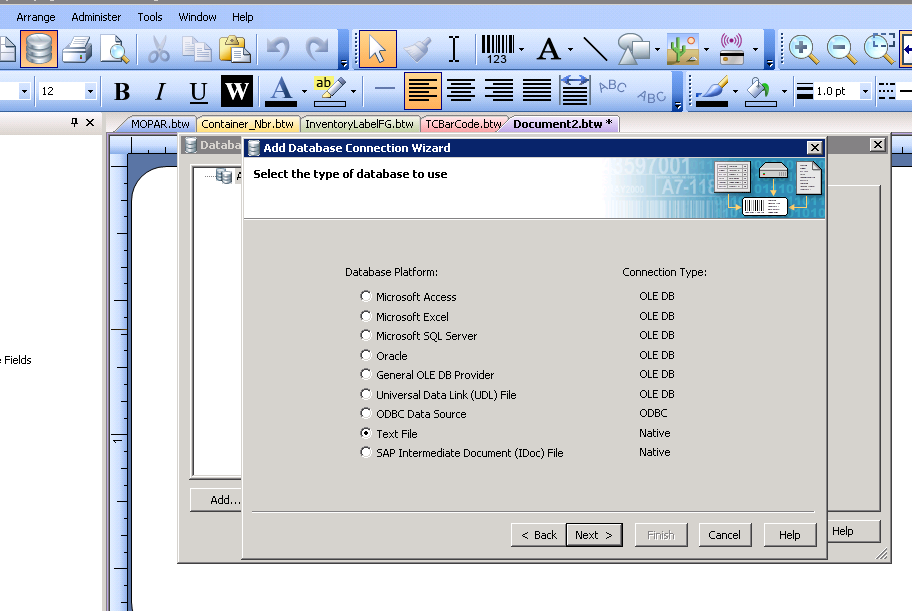
We can then build whatever label file in Bartender.

Note for Syteline Pick, Pack, Ship

A text file is created that will be the basis of the labels created in BarTender.  This file is delivered with the SL install in the DevSetup folder.

The file should be labeled:

· BarTenderDatabaseFile.txt.

The contents of the file will be:

· ShipmentId|PackageId|Hazardous|RateCode|NMFC|MarksExcept|PackageType|PackageDesc|Weight|Item|Desc|UM|Qty|CustItem|Mfg|MfgItem|MfgItemDesc|Lot|Site|Whse|Location|CustNum|CustSeq|ConsigneeName

Create a task in Commander

In Commander, create a new task,

The command type need to be “Commander Script“.  All the details, such as what label template to use, what printer to print to and such, will be specify in the .dd file provided by Syteline.

In Trigger tab, specify the folder to monitor and the file type (.dd) to monitor.

Maintain the Template and Output Directory in Syteline

In Inventory Parameters form,

The output directory will be the place that Syteline drop the .dd file in, and Bartender Commander will monitor this directory for .dd files, it will then change them to .old for Bartender to process.

Enter the label printer on the Printers form

May also maintain a list of Label Template files in Package Label Templates form

Syteline Pick, Pack, Ship Label Printing

A form called “Print Package Label” can be accessed from “Pack Confirmation” or “Ship Master” form.

Print Package Labels

This form is used to select which package labels print jobs should be submitted for the labeling software to print.  Text files will be created and placed into the Output Directory specified on the Inventory Parameters

Printer – The printer that the label will be sent to.

Template Name – The filename of the label file

Copies – The number of copies of each label that should be printed.

Packages Exist – This checkbox will show whether or not packages have been defined for the shipment.

Print Labels By – This radio button set will determine how information will display in the grid if packages have been defined.

The core logic for putting together the .dd file is in Form script: CreateOutputFiles.

       Sub CreateOutputFiles()

Dim Filename As String

Dim Copies As String

Dim oCollection As IWSIDOCollection

Dim i As Integer

Dim Time As String

Dim TextFile(0 To 2) As String

Dim iDay As String

Dim iMonth As String

Dim iYear As String

Dim FileDate As String

Dim Lot As String

Dim Item As String

Dim Desc As String

Dim Qty As String

Dim UM As String

Dim CustItem As String

Dim Mfg As String

Dim MfgName As String

Dim MfgItem As String

Dim MfgItemDesc As String

Dim Package As String

Dim Hazardous As String

Dim RateCode As String

Dim NMFC As String

Dim MarksExcept As String

Dim PackageType As String

Dim PackageDesc As String

Dim Weight As String

On Error GoTo ErrorHandler

oCollection = ThisForm.PrimaryIDOCollection

If ThisForm.Components(“Printer”).ValidateData(True) = False Then

Exit Sub

End If

If ThisForm.Components(“LabelTemplateName”).ValidateData(True) = False Then

Exit Sub

End If

If ThisForm.Variables(“PackagesExistVar”).Value = “1” Then

If ThisForm.Components(“Copies”).ValidateData(True) = False Then

Exit Sub

End If

End If

If ThisForm.Variables(“PackagesExistVar”).Value = “0” Then

If ThisForm.Components(“NumberOfLabelsGridCol”).ValidateData(True) = False Then

Exit Sub

End If

End If

For i = 0 To oCollection.GetNumEntries – 1

If oCollection.GetObjectProperty(“UbSelect”, i) = “1” Then

If ThisForm.Variables(“PackagesExistVar”).Value = “1” Then

Copies = ThisForm.Variables(“CopiesVar”).Value

ElseIf ThisForm.Variables(“PackagesExistVar”).Value = “0” Then

Copies = oCollection.GetObjectProperty(“UbNumberOfLabels”, i)

Qty = oCollection.GetObjectProperty(“UbQtyPerLabel”, i)

Lot = oCollection.GetObjectProperty(“UbLot”, i)

Item = oCollection.GetObjectProperty(“UbItem”, i)

Desc = oCollection.GetObjectProperty(“UbItemDescription”, i)

UM = oCollection.GetObjectProperty(“UbUM”, i)

CustItem = oCollection.GetObjectProperty(“UbCustItem”, i)

Mfg = oCollection.GetObjectProperty(“UbManufacturerId”, i)

MfgName = oCollection.GetObjectProperty(“UbManufacturerName”, i)

MfgItem = oCollection.GetObjectProperty(“UbManufacturerItem”, i)

MfgItemDesc = oCollection.GetObjectProperty(“UbManufacturerItemDesc”, i)

Package = “”

Hazardous = “”

RateCode = “”

NMFC = “”

MarksExcept = “”

PackageType = “”

PackageDesc = “”

Weight = “”

End If

If ThisForm.Variables(“LabelsByVar”).Value = “L” Then

Lot = oCollection.GetObjectProperty(“UbLot”, i)

Item = oCollection.GetObjectProperty(“UbItem”, i)

Desc = oCollection.GetObjectProperty(“UbItemDescription”, i)

UM = oCollection.GetObjectProperty(“UbUM”, i)

Qty = oCollection.GetObjectProperty(“UbQty”, i)

CustItem = oCollection.GetObjectProperty(“UbCustItem”, i)

Mfg = oCollection.GetObjectProperty(“UbManufacturerId”, i)

MfgName = oCollection.GetObjectProperty(“UbManufacturerName”, i)

MfgItem = oCollection.GetObjectProperty(“UbManufacturerItem”, i)

MfgItemDesc = oCollection.GetObjectProperty(“UbManufacturerItemDesc”, i)

Package = oCollection.GetObjectProperty(“PackageId”, i)

Hazardous = oCollection.GetObjectProperty(“Hazard”, i)

RateCode = oCollection.GetObjectProperty(“RateCode”, i)

NMFC = oCollection.GetObjectProperty(“NMFC”, i)

MarksExcept = oCollection.GetObjectProperty(“MarksExcept”, i)

PackageType = oCollection.GetObjectProperty(“PackageType”, i)

PackageDesc = oCollection.GetObjectProperty(“Description”, i)

Weight = oCollection.GetObjectProperty(“Weight”, i)

ElseIf ThisForm.Variables(“LabelsByVar”).Value = “I” Then

Lot = “”

Item = oCollection.GetObjectProperty(“UbItem”, i)

Desc = oCollection.GetObjectProperty(“UbItemDescription”, i)

UM = oCollection.GetObjectProperty(“UbUM”, i)

Qty = oCollection.GetObjectProperty(“UbQty”, i)

CustItem = oCollection.GetObjectProperty(“UbCustItem”, i)

Mfg = oCollection.GetObjectProperty(“UbManufacturerId”, i)

MfgName = oCollection.GetObjectProperty(“UbManufacturerName”, i)

MfgItem = oCollection.GetObjectProperty(“UbManufacturerItem”, i)

MfgItemDesc = oCollection.GetObjectProperty(“UbManufacturerItemDesc”, i)

Package = oCollection.GetObjectProperty(“PackageId”, i)

Hazardous = oCollection.GetObjectProperty(“Hazard”, i)

RateCode = oCollection.GetObjectProperty(“RateCode”, i)

NMFC = oCollection.GetObjectProperty(“NMFC”, i)

MarksExcept = oCollection.GetObjectProperty(“MarksExcept”, i)

PackageType = oCollection.GetObjectProperty(“PackageType”, i)

PackageDesc = oCollection.GetObjectProperty(“Description”, i)

Weight = oCollection.GetObjectProperty(“Weight”, i)

ElseIf ThisForm.Variables(“LabelsByVar”).Value = “P” Then

Lot = “”

Item = “”

Desc = “”

UM = “”

Qty = “”

CustItem = “”

Mfg = “”

MfgName = “”

MfgItem = “”

MfgItemDesc = “”

Package = oCollection.GetObjectProperty(“PackageId”, i)

Hazardous = oCollection.GetObjectProperty(“Hazard”, i)

RateCode = oCollection.GetObjectProperty(“RateCode”, i)

NMFC = oCollection.GetObjectProperty(“NMFC”, i)

MarksExcept = oCollection.GetObjectProperty(“MarksExcept”, i)

PackageType = oCollection.GetObjectProperty(“PackageType”, i)

PackageDesc = oCollection.GetObjectProperty(“Description”, i)

Weight = oCollection.GetObjectProperty(“Weight”, i)

End If

iDay = CStr(Day(Now))

iMonth = CStr(Month(Now))

iYear = CStr(Year(Now))

Time = Format(Now, “hhmmss”)

FileDate = iMonth + iDay + iYear + Time

Filename = ThisForm.Variables(“OutputPathVar”).Value + “Infor” + ThisForm.Variables(“ShipmentVar”).Value + CStr(i) + FileDate + “.dd”

TextFile(0) = “%BTW% /AF=” & “””” & ThisForm.Variables(“TemplatePathVar”).Value & ThisForm.Variables(“FilenameVar”).Value & “””” & ” /PRN=” & “””” & _

ThisForm.Variables(“PrinterVar”).Value & “””” & ” /P /D=” & “””” & “<Trigger File Name>” & “””” & ” /C=” & Copies & “/R=3”

TextFile(1) = “%END%”

TextFile(2) = oCollection.GetObjectProperty(“ShipmentId”, i) & “|” & Package & “|” & Hazardous & “|” & RateCode & “|” & _

NMFC & “|” & MarksExcept & “|” & PackageType & “|” & PackageDesc & “|” & Weight & “|” & Item & “|” & _

Desc & “|” & UM & “|” & Qty & “|” & CustItem & “|” & Mfg & “|” & MfgName & “|” & MfgItem & “|” & _

MfgItemDesc & “|” & Lot & “|” & oCollection.GetObjectProperty(“UbSite”, i) & “|” & _

oCollection.GetObjectProperty(“UbWhse”, i) & “|” & oCollection.GetObjectProperty(“UbLocation”, i) & “|” & _

oCollection.GetObjectProperty(“UbCustNum”, i) & “|” & oCollection.GetObjectProperty(“UbCustSeq”, i) & “|” & _

oCollection.GetObjectProperty(“UbConsigneeName”, i)

System.IO.File.WriteAllLines(Filename, TextFile)

End If

Next i

ThisForm.CallGlobalScript(“MsgApp”, “Clear”, “Prompt”, “SuccessFailure”, _

“mI=CmdSucceeded”, “Process”, “”, “”, “”, “”, “”, “”, “”, “”, “”, “”, “”, “”, “”, “”, “”)

Exit Sub

ErrorHandler:

ThisForm.CallGlobalScript(“MsgApp”, “Clear”, “Prompt”, “SuccessFailure”, _

“mI=CmdFailed”, “Process”, “”, “”, “”, “”, “”, “”, “”, “”, “”, “”, “”, “”, “”, “”, “”)

End Sub

Custom Label Printing

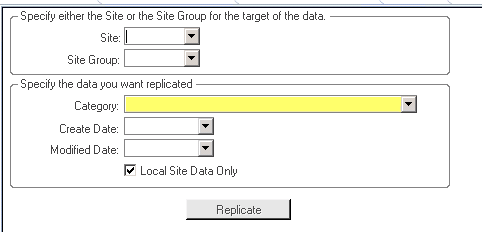
We may use the similar logic to construct other custom label printing.

1) Need to define two form variables, and get the values during StdFormPredisply

SLShipmentPackages.LabelPathsExistSp( PARMS(RVAR V(TemplatePathVar), RVAR V(OutputPathVar)) )

2) Form method

      Sub CreateOutputFiles()

Dim Filename As String

Dim Copies As String

Dim oCollection As IWSIDOCollection

Dim i As Integer

Dim Time As String

Dim TextFile(0 To 2) As String

Dim iDay As String

Dim iMonth As String

Dim iYear As String

Dim FileDate As String

Dim Item As String

Dim VendorItem As String

Dim InDate As String

Dim Serial As String

On Error GoTo ErrorHandler

If ThisForm.Components(“Printer”).ValidateData(True) = False Then

Exit Sub

End If

If ThisForm.Components(“LabelTemplateName”).ValidateData(True) = False Then

Exit Sub

End If

If ThisForm.Components(“Copies”).ValidateData(True) = False Then

Exit Sub

End If

Copies = ThisForm.Variables(“CopiesVar”).Value

iDay = CStr(Day(Now))

iMonth = CStr(Month(Now))

iYear = CStr(Year(Now))

Time = Format(Now, “hhmmss”)

FileDate = iMonth + iDay + iYear + Time

Filename = ThisForm.Variables(“OutputPathVar”).Value + “ETE” + ThisForm.Variables(“Serial”).Value + FileDate + “.dd”

TextFile(0) = “%BTW% /AF=” & “””” & ThisForm.Variables(“TemplatePathVar”).Value & ThisForm.Variables(“FilenameVar”).Value & “””” & ” /PRN=” & “””” & _

ThisForm.Variables(“PrinterVar”).Value & “””” & ” /P /D=” & “””” & “<Trigger File Name>” & “””” & ” /C=” & Copies & “/R=3”

TextFile(1) = “%END%”

TextFile(2) = ThisForm.Variables(“Item”).Value  & “|” & ThisForm.Variables(“Serial”).Value & “|” & _

ThisForm.Variables(“VendorItem”).Value  & “|” & ThisForm.Variables(“InDate”).Value

System.IO.File.WriteAllLines(Filename, TextFile)

ThisForm.CallGlobalScript(“MsgApp”, “Clear”, “Prompt”, “SuccessFailure”, _

“mI=CmdSucceeded”, “Process”, “”, “”, “”, “”, “”, “”, “”, “”, “”, “”, “”, “”, “”, “”, “”)

Exit Sub

ErrorHandler:

ThisForm.CallGlobalScript(“MsgApp”, “Clear”, “Prompt”, “SuccessFailure”, _

“mI=CmdFailed”, “Process”, “”, “”, “”, “”, “”, “”, “”, “”, “”, “”, “”, “”, “”, “”, “”)

End Sub

CREATING OUTSIDE OPERATIONS

November 29th, 2013 No comments

If the actual work on an operation is performed at a location other than your shop floor, you must perform special steps to capture the status of the operation for accurate planning, scheduling, and costing. If you do not represent and manage an outside operation properly, the effects can ripple down through subsequent processes, resulting in an over-conservative plan and schedule.

To capture outside operation status, you can:

·         Post time or quantity remaining on the operation (the Operation Scheduling parameter on Shop Floor Control Parameters determines whether hours or pieces remaining are posted). You must specify the operation’s work center as "Outside" on the Scheduling tab on the Work Centers form. Use this method only if you have accurate status information for the outside operation.

·      Cross reference the outside operation to one or more purchase order line items. Time remaining on the operation is calculated using the purchase order line item due dates.

Because you may not necessarily have accurate information to post time or quantity remaining for an outside operation, we recommend you model outside operations using the cross-referenced purchase order method (although you can use that method and also post time or quantity to the operation if you have the status information).

This help topic describes how to set up the cross-referenced purchase order method.

Setting Up the Outside Operation

In summary, to set up the outside operation, you must create a purchased material and issue it to the operation. Follow these steps:

1.    On the Scheduling Shifts form, create a scheduling shift consisting of one shift interval that starts on Sunday at 00:00 hours and ends Saturday at 24:00 hours (7 days x 24 hours). You will be using an infinite resource group to represent this process. Therefore, you need a 24×7 shift to ensure that the planning and scheduling programs process the infinite resource consistently (scheduling ignores the shift and considers the resource always infinite, while MRP and APS consider the resource infinite only while on-shift).

2.    On the Resources form, follow these steps:

1.    Create a new resource for the outside operation.

2.    On the General tab, you can accept the default values for the fields.

3.    Select the Shifts tab. In the ShiftID#1 field, select your 24×7 scheduling shift.

3.    On the Resource Groups form, follow these steps:

1.    Create a new resource group.

2.    In the Infinite Capacity After field, enter 0. This sets the resource to infinite capacity for planning purposes. If your Planning Mode is set to MRP, you can skip this step.

3.    Select the Infinite field to set the resource to infinite capacity for scheduling purposes.

4.    Select the Resources tab. Add your outside resource as a member of the group.

4.    On the Work Centers form, follow these steps:

1.    Create a work center to use for outside operations. You can use the same work center for more than one outside operation.

2.    On the Scheduling tab, select the Outside field. Defining the work center as Outside signals the planning and scheduling processes to perform special calculations so you don’t have to enter the time the parts have been away from the shop. The Outside work center also captures the cost in the "Outside" GL account you set up on the Product Codes form.

3.    Select the Resource Groups tab. Add the infinite resource group you created earlier in this procedure.

5.    On the Job Operations form, follow these steps:

1.    In the WC field, select your outside work center.

2.    In the Fixed Schedule Hours field (if you are using fixed schedule hours) or the appropriate hours per piece/pieces per hour field, enter the number of hours that corresponds to the normal lead time for this outside operation.

3.       NOTE: Regardless of whether you specify Fixed Schedule Hours, the system temporarily switches the operation to fixed schedule hours during the planning or scheduling run.

4.    Select the Resources tab and verify that your infinite resource group is displayed. If it is not, select it now.

5.    Select the Costs tab and enter 0 in all the costing rate fields. The material you issue to the operation will capture the cost of the outside operation.

6.    On the Items form, follow these steps:

1.    Create an item to represent the item your outside operation will be providing.

2.    In the Source field, select Purchased. This allows you to cross reference the material on the bill of material to a PO.

3.    In the Type field, select Other. This Type code prevents the system from creating planned orders for this item (instead, you will use the cross-reference feature).

4.    Consider how to track cost for this purchased item. To apply the cost of the outside operation only to this order, set the Cost Type to Actual, set the Cost Method to Specific, and select the Lot Trackedfield.

7.    On the Job Materials form, follow these steps:

1.    Find the job and your outside operation.

2.    Add a material record for the outside operation item.

3.    In the Quantity field, enter 1.

4.    Select the Lot field (so the quantity is 1 per lot).

Processing the Outside Operation

After setting up the outside operation, follow these steps to process it.

1.    On the Unposted Job Transactions form, enter a transaction to move the WIP from the previous operation to the outside operation.

2.    Use the Post Job Transactions form to post the transaction.

3.    On the Job Operations form, make sure all operations previous to the outside operation are marked as Complete.

4.    Create a cross-referenced purchase order line item. We recommend you do this as soon as you start the operation. Follow these steps:

1.    Open the Job Materials form.

2.    Find your outside material record.

3.    Select the Xref tab.

4.    In the Ref field, select Purchase Order.

5.    Click the X-Ref button to create the cross reference.

6.    Click the X-Ref button again to display the Purchase Order Lines form.

7.    On the General tab, set the Due Date of the cross-referenced PO line item to the date you expect to receive the outside materials from the vendor.

8.    Select the Costs tab. Specify the correct cost on the purchase order.

5.    Physically send the purchase order and materials to your vendor.

6.    Adjust the PO line item due date as necessary.

Receiving the Outside Materials

1.    Use the Purchase Order Receiving form to receive the outside materials from the vendor.

2.    The receipt transaction automatically opens the Job Material Transactions form. On this form, issue the materials to the job.

3.    After you issue the materials, the Post Job WIP Move Transactions form opens automatically. On this form, record this operation complete and move the materials to the next operation.

How SyteLine Calculates Outside Operation Duration

NOTE: If you are not using the cross-referenced purchase order method, and are posting time on the operation, the system plans the outside operation Run Duration normally (based on posted time/quantity).

The system considers the due date of the outside operation’s cross-referenced PO line item when it calculates the operation duration. Basically, the system may reduce or extend the outside operation’s duration, provided the operation is the first open (that is, not posted Complete) operation in the routing.

  • If all of an outside operation’s cross-referenced PO lines are Complete or Filled, the system sets the Run Duration, Move, Queue, and Finish fields to 0.

  • If any PO line has a status of Ordered, and the operation has been started (that is, operation quantity received is greater than 0), the system adjusts the Run Duration as shown in the table below.

If…

SyteLine sets the Run Duration to

This Operation is the first open operation in the routing.

OR

The normal Run Duration value (based on posted time/qty) is greater than the Due Date/time of the latest cross-referenced PO line item – Current Time.

Due Date/time of the latest cross-referenced PO line item – Current Time. The Move, Queue, and Finish hours fields are set to 0.

If the adjusted duration is less than 0, the system sets the operation’s Run Duration to 0.

NOTE: The time value on the Due Date comes from the Supply Time field on the Planning Parameters form.

There are operations previous to this one that are not posted Complete.

Set the Run Duration to the earlier of (1) the normal Run Duration based on posted time/qty or (2) the Due Date/time of the latest cross-referenced PO line item – Current Time.

The typical procedure used for dealing with outside processing is the following:

1) Configure an operation in the job routing as a outside operation.

This is done by specifying a work center which is flagged as an outside work center on the Work Center Scheduling screen. The operation will normally not have any values in the Move, Queue, Setup, Labor Hrs/Pc or Machine Hrs/Pc fields since there is no internal labor or machine cost for an outside operation. The duration of the outside operation is usually entered into the Fixed Sched Hrs field so that the scheduling routine schedules the appropriate amount of time for the operation.

2) Add a material which represents the service.

Add material to the operation with a part number which represents the service being provided by the vendor. The should be a Type (O)ther material and may or may not be in the item master. Set the Ref to "P". The material can be set up as per (L)ot with a Cost for the entire lot or as per (U)nit with a per unit cost for the service.

3) Cross reference the material to a purchase order.

Select Edit/Xref from the job material screen to create a purchase order which will then be linked to the material. The item number, description, quantity ordered, and cost will all be set based on how you set up the material. If the item is in the item master and you have set up and item/vendor cross reference record for the item, the number one ranked vendor will be assigned to the purchase order. Otherwise, you would need to specify the vendor on the PO.

4) Process the internal operations leading up to the outside operations and then send the parts to the vendor.

5) Enter a PO receiving transaction for the service.

When the parts come back from the vendor, you should process a PO receipt. When you do so, the system will see that the PO line item is tied to a job material and will, when the PO receipt is finished, take to the job material issue screen so you can issue the service to the job. You will then be taken to a third "Job WIP Move" window from which you can move the pieces on to the next internal operation in the job’s routing.

6) Process the remaining internal operations and move the parent item into inventory.

At that point you have completed the process. The value of the service will be posted into the WIP Outside cost bucket on the job and will appear on all of the job costing reports as outside cost. Any type (O)ther material tied to an outside operation is considered outside cost. If the Type is (M)aterial for this item, its cost will be considered material cost on the job rather than outside cost.

How to extract and/or copy Event metadata

November 18th, 2013 No comments

To extract the Event System metadata, please do the following:

  1. On the Syteline utility server, go to <install drive>:\program files\Infor\Syteline
  2. Double-click on AppMetadataTransport.exe
  3. On the first few forms of the wizard, enter the appropriate information (e.g., select to export the metadata to an XML file, pick the appropriate configuration, browse to enter an export file name)
  4. Next there will be several forms with different selection options starting with “IDOs to export”.  Skip these by clicking <Next> until you see the form for exporting Events.
  5. On the Events form, select the option “Export Event MetaData for this AccessAs value” and select (null) as the AccessAs value.  Note:  Most user-defined event handlers are setup with AccessAs = Null.  If this is not the case in your environment, then you would specify your AccessAs value when extracting.
  6. Then click through the rest until the last form.  Select <finish> on the last form.
  7. The metadata will be extracted to the xml file specified in the wizard.  If Infor Support requested the Event metadata, please send them that xml file.

If you need to copy the metadata to another environment, then you would use the same utility to import the metadata into another database, but instead select to import and reference the XML file you just created.  IMPORTANT NOTE:  This will overwrite all event handlers with the same AccessAs value in the target database.  Please see linked KB 953806 for related CER:  CER 135998 – Need utility to import/export single events that will also not overwrite existing events when importing.

Additional information on copying events from one environment to another:

1)  If you have just a few event handlers that need copying and want to preserve the events in the target environment, then there are a couple of options:

  • You can manually recreate the event handler records and then manually copy and paste the actions

or

  • You can export events from both the source and target environments into separate xml files.  Make a copy of the target xml and edit the copy.  Manually copy and paste the source event data into the target xml copy.  If the event handler’s event name is the same between the two files, then assign a unique sequence number to the one(s) you are adding to the xml.  Then import the target copy which now contains both the original events and the few that have been added.

2)  If you have a lot of events and want to copy all of them, you could edit the xml file from the source events and change the Access As value and then import that xml file.  The target Access As value would be the new one you assign.  Please note that you would need to not only change the Access As value at the top of the XML document, but also add a node: <AccessAs>value</AccessAs> to every Event, Event Global Constant, Event Trigger, Event Initial State, and Event Handler in the document.  Once you import it, if you have to make changes to any of the events you imported under the different Access As value, you will have to change the Access As value in the database, or you would need to reset the AccessAs value on the events in the appropriate Event related tables to their original value.

Sample way of constructing email body and subject in Event system

October 22nd, 2013 No comments

Below are some sample ways of constructing email body in Syteline event system. 

BODY( SUBSTITUTE(“We have a new customer. Please see customer number {0} for customer: {1}.”, FP(“custNum”), FP(“custName”) ) )

BODY( IF( P(“POCost”) > 10000, GC(StdApprovalMessageBody), GC(StdRejectionMessageBody) ) )

BODY( FILECONTENTS(“X:\SL\Event\Message\Body\myPreparedMessage.txt”) )

BODY( FILECONTENTS(“X:\SL\Event\Message\Body\” + IDO() + EVENTNAME() “.txt”) )

BODY( DBFUNCTION( “MsgBodyFunction”, EVENTNAME(), IDO(), P(“RowPointer”) ) )

Categories: Development Tags:

Syteline Project Costing Transaction, Part 1

October 14th, 2013 No comments


Project Resource Transaction

Two ways to post: 1) Project Resource Transaction Form; 2) Xref to PO and during PO receiving transactions


Debit

Credit

Note

Material or Other

Material Inventory or

Expense

Defined by material prod code or

On transaction screen

Project Material Account

Defined by Project Product Code

Project OH

Project Applied OH

Project Parameter: Appl OH Acct

Project OH Account

Defined by Project Product Code

Project G&A

Project Applied G&A

Project Parameter: Appl G&A Acct

Project G&A Account

Defined by Project Product Code


Project Labor Transactions

Note: only project rate apply in calculation, pay rate has no impact.


Debit

Credit

Note

Labor

Direct Labor Applied Acct

Defined by Department Code, linked from employee to dept

Fixed Labor OH Applied

Defined by Department Code, linked from employee to dept

Variable Labor OH applied

Defined by Department Code, linked from employee to dept

Project Labor Account

Defined by Project Product Code

Project OH

Project Applied OH

Project Parameter: Appl OH Acct

Project OH Account

Defined by Project Product Code

Project G&A

Project Applied G&A

Project Parameter: Appl G&A Acct

Project G&A Account

Defined by Project Product Code

AP Voucher Post to Project


Debit

Credit

Note

AP Journal

Accounts Payable

Defined by Department Code, linked from employee to dept

Project Account

Depended on Project Cost Code entered in AP Voucher Distribution screen, use project labor, project material or project other account, defined in Project Product Code

PC Journal Project OH

Project Applied OH

Project Parameter: Appl OH Acct

Project OH Account

Defined by Project Product Code

Project G&A

Project Applied G&A

Project Parameter: Appl G&A Acct

Project G&A Account

Defined by Project Product Code

SQL: Select … for XML

May 23rd, 2012 No comments

The Select … for XML can be useful.  Let say that you want to list out Job Order information, one job per line, and one of the field will be WC, and you want to show all WCs for the job, in the format like WC1, WC2, WC3, …  Here is the select statement will work the trick.

Select j.job, j.suffix, j.order_date, j.item, j.qty_released,

(Select jr.wc + ‘,  ‘  as ‘text()’ from jobroute jr where jr.job = j.job and jr.suffix = j.suffix

  for XML path(”)) as ‘WC’

from job j where j.status = ‘R’

Categories: Development, SQL Tags: ,